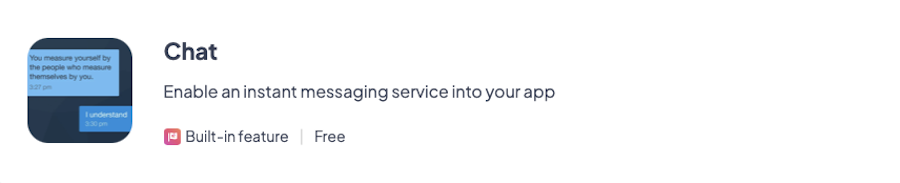
The Chat add-on is a one-to-one messaging service.Users can send messages to each another (not photos, videos, emojis, or URLs, only plain text).
This add-on is free up to 5000 registered users (if you have more registered users, please contact the support).
Activate the chat:
1. Install the Authentication Add-On and the Community Add-on.
2. Go to the menu Add-ons > Catalogue and click the “More Info” button under “Chat “
3. Click the green button “+ Add”
1. Chat section
A new Chat section is added to your section list in the menu My App > Content > Sections
To edit the design of the list and detail templates and header of this section:
1. Click the 3 dots next to your section chat
2. Click “Modify Design”
Choose from 3 different templates for the list and detail views of the Chat section*.
*The list and detail templates are independent from each other, you can combine them:
For instance, you can select template 1 for the list view, and template 3 for the detail view.
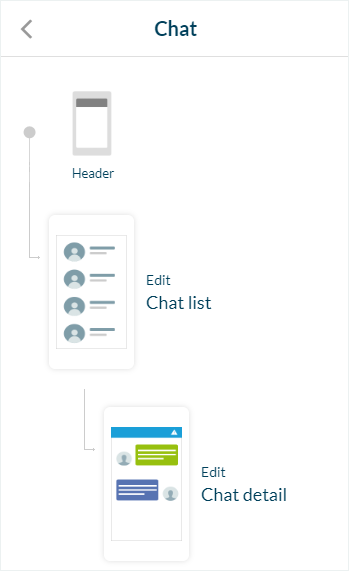
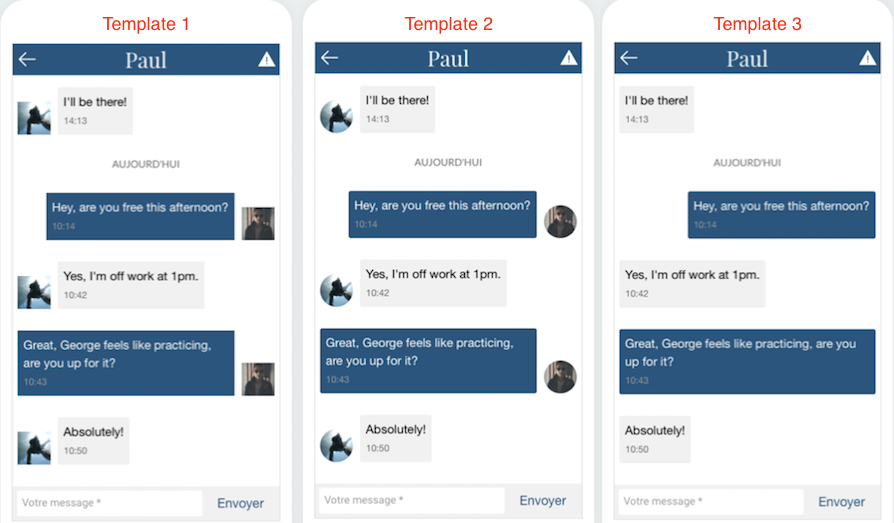
2. Chat detail templates
- Detail Template 1 displays square photos and square message boxes.
- Detail Template 2 displays rounded photos and square message boxes.
- Detail Template 3 displays no photos and square message boxes.
3. Chat list templates
List Template 1 displays:
– all the received messages (less recent to most recent one),
– the name and picture of the contact (or the default picture, if the user doesn’t have an avatar),
– the date of the last message,
– the write button.
List Template 2 displays:
– all the received messages (less recent to most recent one),
– the name and picture of the contact (or the default picture, if the user doesn’t have an avatar),
– the date of the last message,
– a bullet indicating there is a new unread message at the left of the picture
– the write button.
List Template 3 displays:
– all the received messages (less recent to most recent one),
– the name of the contact (no picture),
– the date of the last message,
– a bullet indicating there is a new unread message at the left of the picture
– the write button.

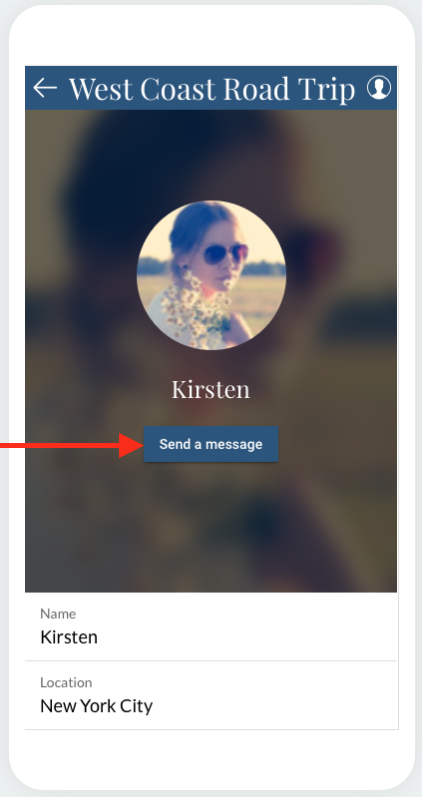
4. Send a message to another user
To send a message to another user of the app, select his profile in the Users page of the app, and inside his profile, click on the “Send a message” button.
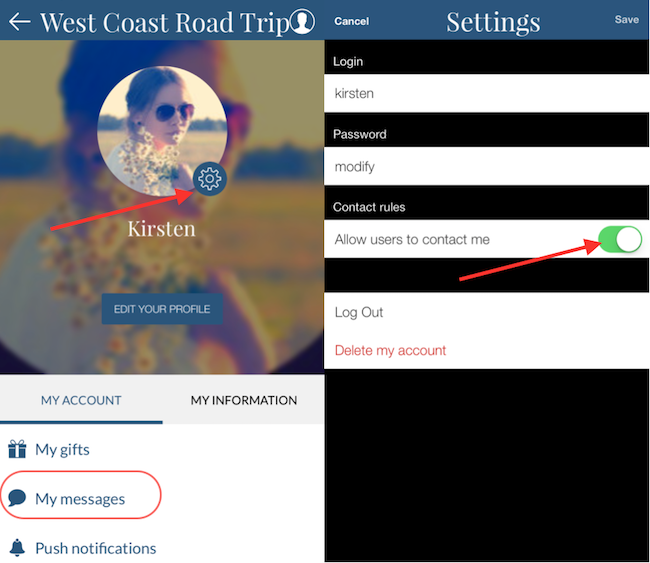
5. Activate / Deactivate the possibility to be contacted by other users
The profile of the app users is public by default, to choose to not be contacted by other users:
1. From the app, go to their own Profile page > My messages
2. Set the “Allow users to contact me” button to “OFF”.
When a user does so, the “Send a message” button disappears from their public profile.
Note: Previous received messages are still visible in “My Messages”, and it is possible to keep on sending messages into the existing conversations.
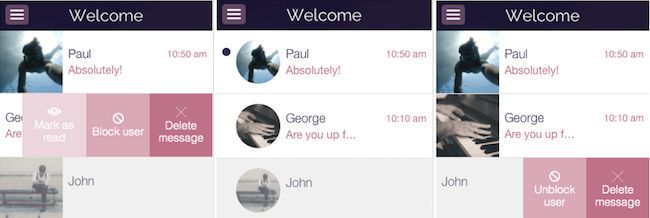
6. Block / Unblock users – Mark messages as read – Delete a conversation
When viewing the list of messages, swipe left on a conversation to access the different options described below:
– Block user
You won’t receive any further message from the blocked user.
The blocked user doesn’t know he has been blocked (he can keep on sending messages to you, but you won’t receive them).
The conversation you had with the blocked user is stocked at the bottom of the list of conversations, and the conversation is grayed out.
– Unblock user
You can now receive messages again from the user who was previously blocked.
If the user sent you messages while he was blocked, you can now see these messages in the conversation.
– Mark as read (only with the List Templates 2 & 3)
When you mark the conversation as read, the bullet indicating you have a new message will disappear.
– Delete message
This action deletes the whole conversation you have with this contact.
Warning:
If you blocked a user and delete the conversation, you can no longer unblock this user!
If you only delete the conversation, if you reopen it, your previous messages will be displayed again.