1. Activate the Authentication add-on
1. Go to the menu Add-ons > Catalogue
2. Click the “More Info” button under Authentication.
3. Install it from the Add-On store by clicking on the “+ Add” green button.

2. “Login Box” and “Profile” section
After activating the Authentication add-on, two new sections are added in your section list. They are accessible from the left menu My App > Content > Sections : the Login Box and the Profile.
The “Login Box”* is what your users see when they sign up/sign in to the application.
Personalize it with the 3 different design templates offered.
*The “Login Box” section cannot be moved in the list of section. It will always be at the top of the list. This has no impact on the overall menu of the app because it is not actually a real page, but more of a step before accessing content.
Note: the Profile section displayed in the back office preview is not yours, it’s just a standard model.
3. Personalize the Profile section
1. Click on the left menu My App > Design > Sections .
2. Click on the section “Profile”.
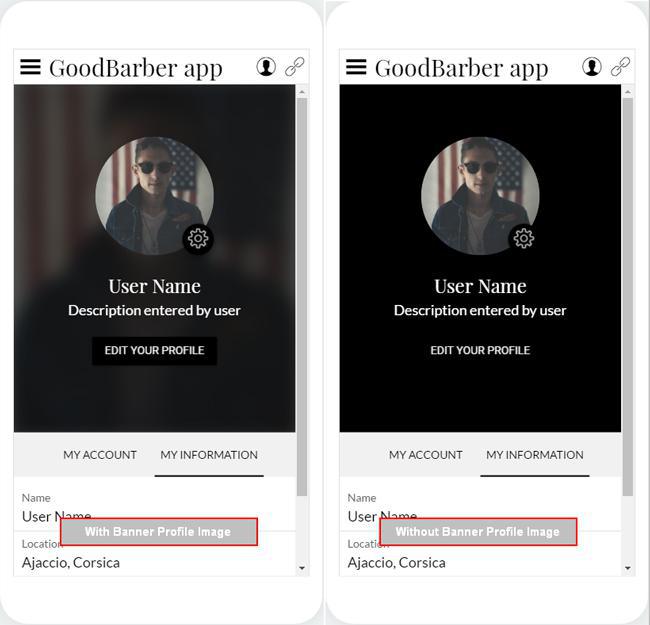
– “Banner Profile Photo”: Choose whether or not to display the profile image in the background of the profile section.
– Edit the fonts and colors of your profile section.
4. Access to Profile Section
Give access to this section on your app:
- Create a link to this section from your home section.
- Create a link to this section from the navigation menu of your app.
- Add an action button from the header of your app.
5. User management
In the left menu Users, you have access to 4 sub-menus:
1/ List :
Here you will find the list of users who have signed up. This list gives you some information about your users.
– Modify user information by clicking on their name
– Add a user directly from the back office by using the button provided for this purpose2/ Public/Private :
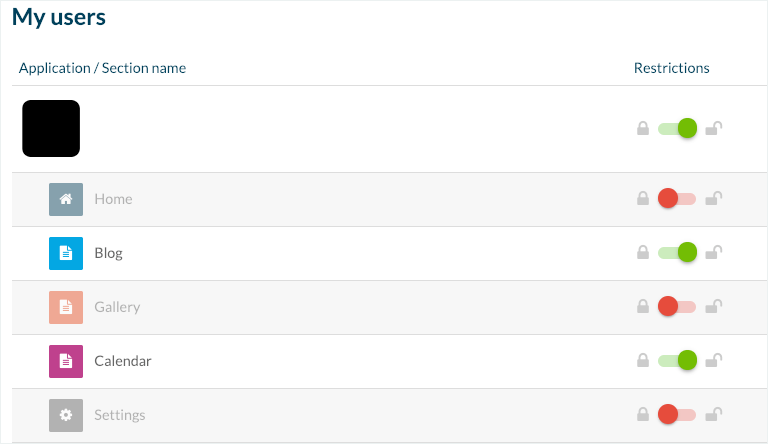
Decide if your users must sign in to access the entirety of the app, or only to access specific sections.
The status is indicated by the red “Private” button or green “Public” button.
By default, the entirety of the app is private.
3/ Import :
Gives you the possibility to import a list of users to your app into a CSV file.
For more details, please check online help “Exporting or importing a list of users “.4/ Settings :
This menu has 2 different tabs.
Connection/subscription Tab:
A) Sign Up
– Authorize users to sign up in the app or not
If you place the button in the OFF mode, only users that are already in the user list can access content restricted by login.
This can be useful if your app is intended exclusively for internal usage.
– Permit users to access private content without subscribing or not.
If you place the button in ON mode, users will have the option to skip the sign up/sign in and directly access the app or the section restricted by the login.

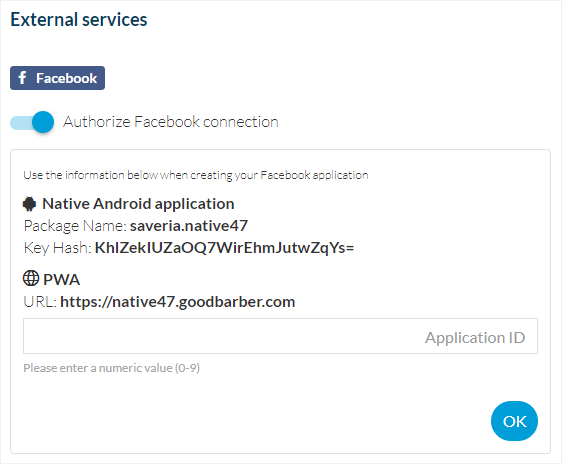
B) External Services
Activate the possibility for the user to sign into the app with their Facebook or Twitter profile.
To do this, you will have to set up each service as detailed in the specific online helps.
If you have already followed the procedures to configure Facebook and Twitter, the information should already appear in each section, and you will not have to redo this process.
When the user signs in via Facebook or Twitter, their profile photo, name, location, and number of friends/followers will automatically be retrieved.
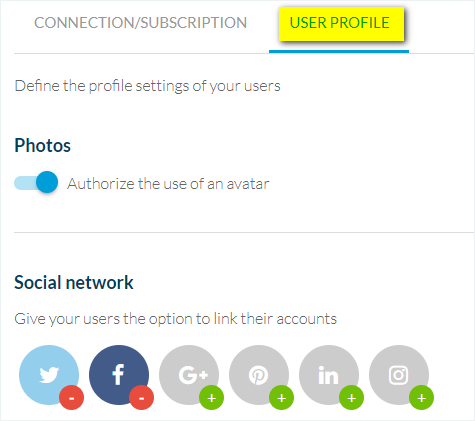
User profile Tab:
Set up the information requested in the user profile.
Authorize the addition of an avatar or not, permit users to include several of their social network accounts.
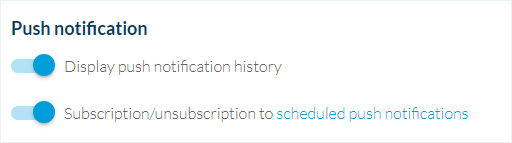
Display the push notification history or not on their profile (native offers only).
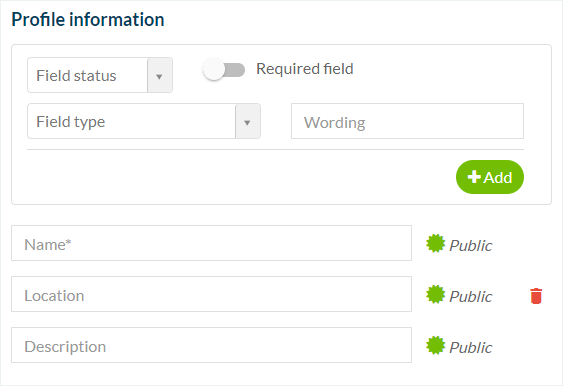
Add supplemental information fields:
1. Choose the type of field
2. Choose the title
3. Click “+ Add”
4. Save your changes.
These settings will display the same way as in :
-The Profile section of the user in the application
-The List menu as soon as you modify information of an existing user
-The List menu as soon as you add a new user